When Can You Go Over Existing Tiles?
Before you order PVC panels, inspect your existing wall. PVC panels are only as stable as the surface they’re glued to. Thoroughly check for the following things in your tiled walls.
1. Are the tiles structurally sound?
Lightly tap on your tiled walls. Check if there is any hollow sound. Does the plaster look loose or peel off anywhere? Is any tile about to fall? Must ensure that all the tiles have enough strength to support the new panels before doing anything else. It is recommended to look into all these issues effectively.
2. Is the wall reasonably flat?
PVC panels are flexible, but they still cannot hide large cracks or unevenness in a wall. Place the long spirit level against the tiled wall. If you see any dips or a column of tiles sticking out widely, then they need to be fixed. Otherwise, your PVC panel will not attach or fit seamlessly.
3. Is the wall dry?
If there are any moisture or dampness issues beneath your tiles, then covering them with plastic panels will lock all the moisture inside. As a result, it will rot or damage your PVC paneling structure underneath. Thus, you must fix all the water leakages problems before installing your wall cladding.
Essential Tools and Materials
Before proceeding with paneling your walls, you must collect all the essential tools for a hassle free process.
- PVC Panels
- Matching Trims
- High-Strength Waterproof Grab Adhesive
- Mould-Resistant Silicone Sealant
- Fine-Toothed Handsaw
- Utility Knife
- Spirit Level
- Tape Measure
- Heavy-Duty Degreaser
- Sugar Soap
- Fine-Grit Sandpaper
- Sanding Pad
- Caulking Gun
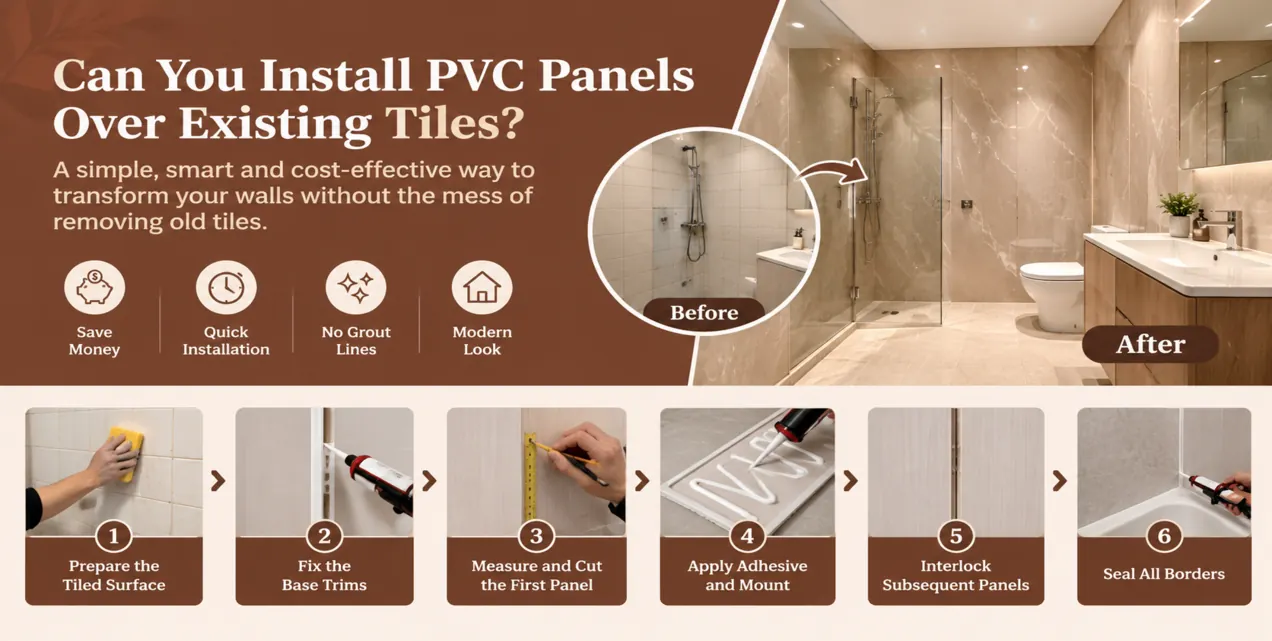
Step-by-Step Installation Guide to Fit PVC Panels Over Existing Tiles
This is the step by step and easy to follow process of how to install PVC wall panels over existing tiles.
Step 1# Prepare the Tiled Surface
The most important step in ensuring that your adhesives hold onto your wall panels for years to come.
Scrub the wall
The walls of the kitchen and the bathroom get dirty with soap scum, oils produced by the human body, and cooking grease. Thus, the cleaning has to be done using some strong degreaser or sugar soap. After this procedure is completed, rinse the walls with clean tap water and let them dry.
De-gloss the glaze
Ceramic tiles are sleek and non porous, which helps them repel any material. Just give these tiles a quick scrub with some fine sandpaper. The purpose is not to sand the tiles down, but to make the surface rough for the adhesive to be able to stick.
Secure the floor plan
Remove any loose tiles that may be present. Fill the areas with quick setting mortar or bonding plaster in order to achieve a flat surface.
Step 2# Fix the Base Trims
Trims ensure the installation is waterproof and also give panels a neat finish. Measure your corners and ends where the panels will come to a halt (example – floor, ceiling). Cut your internal corner trims and end caps to size using a saw with fine teeth. Put on a line of silicone/adhesive at the back of the trim and fix it at the wall corner.
Step 3# Measure and Cut the First Panel
Use a measuring tape to measure the height of the wall, from the bottom edge of the trim to the top of the wall and cut the PVC panel according to the required mark. Always hold the decorative face upwards if cutting using a handsaw to prevent the edges from fraying and chipping. If the installation starts right inside a corner, beware that the first panel will most likely require a cut on the tongue edge to fit snugly in the corner trim.
Step 4# Apply Adhesive and Mount
Turn the panel upside down in order to see the hollow back. Take a caulking gun and fill it with grab adhesive. Apply thick, vertical lines or zigzag patterns on the panel. Ensure that every line is about 10–15 centimeters apart. Do not apply glue too close to the edges so that it doesn’t leak into joints.
Inserting the panel edge into the corner trim is the next step. The face of the panel should be pushed well against the tiled wall. You may use a roller or a cloth to firmly press it down all over its area to make sure that glue spreads well underneath the panel and sticks to the tiles.
Use your spirit level to examine the panel. If it is not straightened well yet, you can still fix the angle of the panel until the glue sets.
Step 5# Interlock Subsequent Panels
Take measurements and cut the next panel. Put some clear silicone inside the groove of the existing panel installed on the wall. It will now work as a seal, preventing water from passing through the joints.
Use grab adhesive on the back side of the new panel. Position the tongue of the new panel into the silicone-coated groove on the first panel. Once the two pieces are fitted into place, wipe any excess silicone coming out of the seam right after with a wet cloth. Complete this step for the whole wall.
Step 6# Seal All Borders
After putting all the panels in place, it is important to seal the perimeter. Apply properly a silicone sealant that resists mold. A good quality silicone sealant allows you to make a smooth bead of silicone all along the joints where the panel connects to walls, floor, and pipes. After the sealing, a cure time of at least 24 hours would be required before using the facility.
Important Tips to Keep in Mind
While the above instructions are ideal for a successful installation, keep the following tips in mind to prevent common mistakes;
Fixture Depth
The installation of the PVC panels on the existing tiles will create an additional thickness of 5-10 mm. Thus, all the valves, handle pulls, and pipe extensions will appear to be recessed by the same amount compared to the wall surface. You will need to examine your current fixtures and fittings and probably replace them with deep collar extensions or longer screws.
Heavy Wall Items
PVC panels are made with a hollow core, which makes them very lightweight and incapable of carrying any heavy items. Therefore, if you want to install a glass shower door, a big mirror, or a handle/bar on the wall, keep in mind that you should not fix them with the help of the plastic panel at all. The best option is to use longer screws and wall plugs, which will pierce through the panel and tile and get deeply secured in strong studs or bricks.
Heat Exposure
PVC is a type of plastic. So it does not work best in high temperatures. It is highly safe for showers and behind bathroom sinks, but it is not recommended behind a gas stovetop or open hob in a kitchen. The heat from gas burners can cause the plastic to warp or discolor over time.
Conclusion
Fitting PVC wall panels over the old wall is a very easy and convenient job. If you know how to do it right, it is not an issue to connect PVC to old wall tiles. After doing some scrubbing and preparing the old tile surface and getting the right adhesive for PVC wall installation, as well as making sure that the edges receive silicone sealing, you will have waterproof PVC walls that look like the finest.